Choosing your tiles
Tiling stairs indoors and outdoors: treads, risers and stair nosings
Tiling a staircase means covering every tread and every riser, and taking particular care over the stair nosing, the most exposed part. Indoors, the aim is strength and clean finishes; outdoors, the tile must also be frost-resistant and slip-resistant, usually R11 or higher, laid with a slight fall so that water runs off.
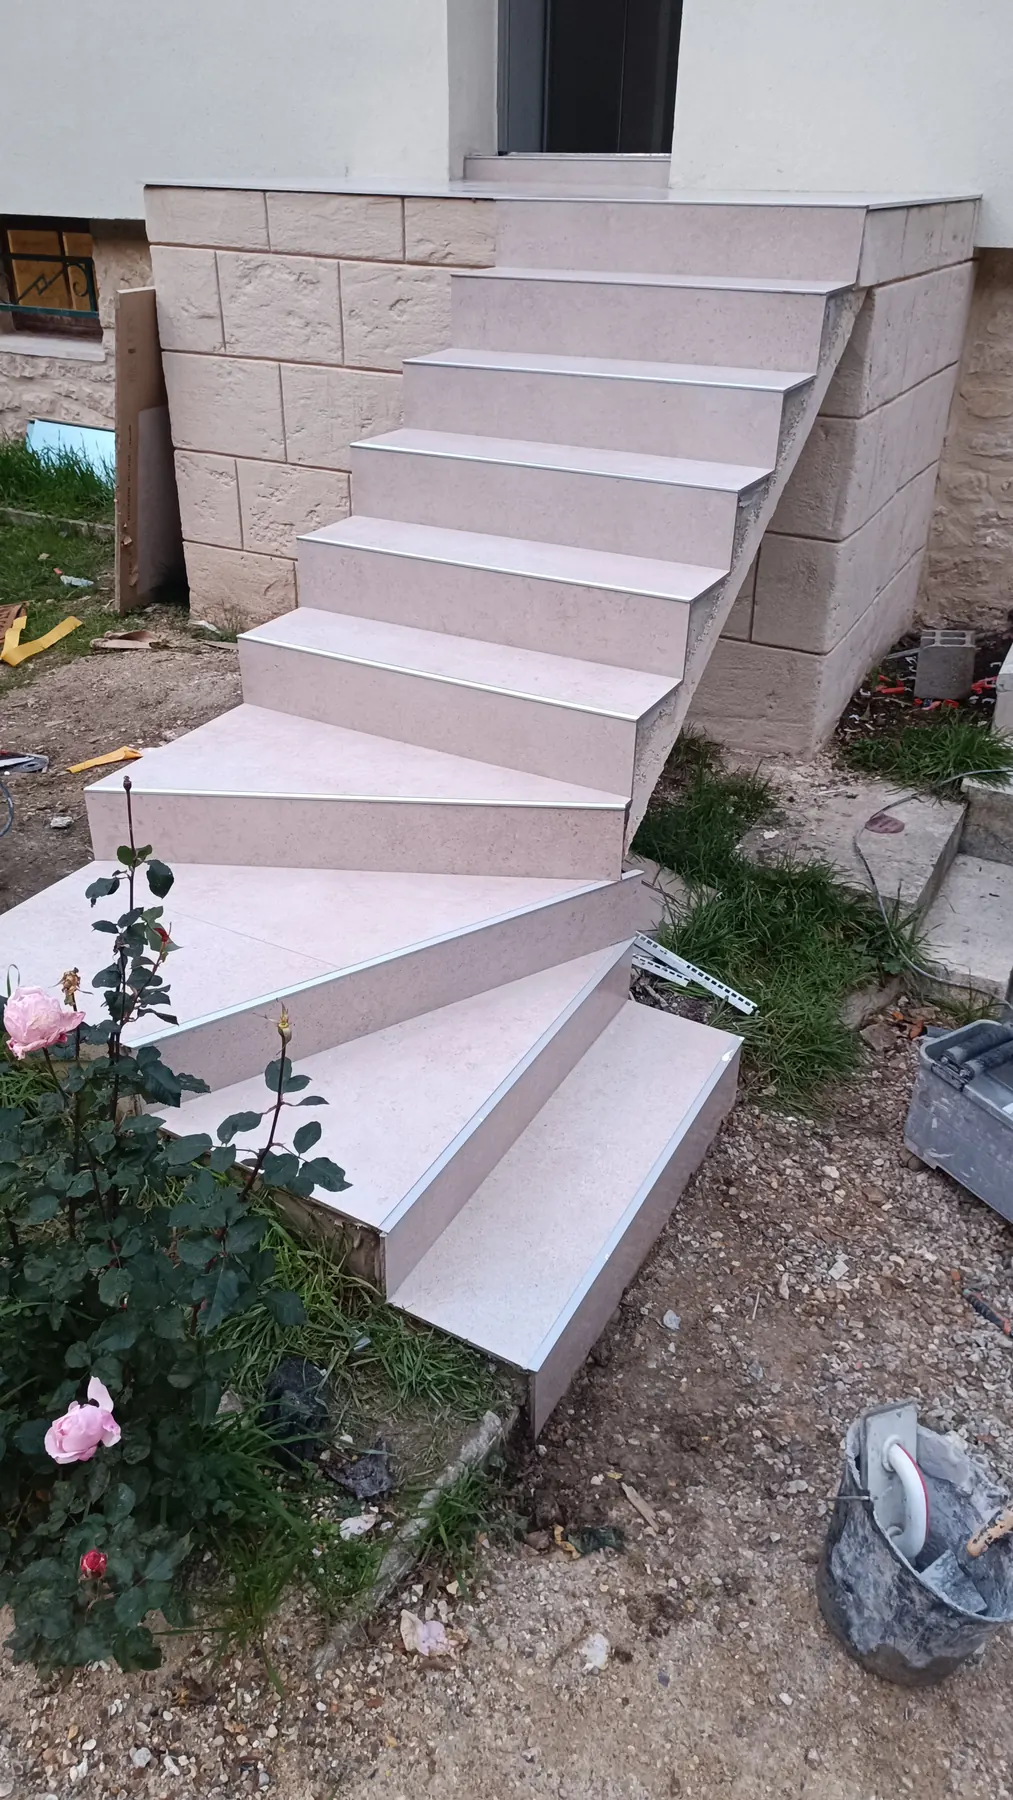
A staircase packs the difficulties of tiling into a few square metres: cuts on every step, edges that take the knocks, step heights to respect and, outdoors, rain and frost. It is also where a defect costs the most, since people fall on stairs more easily than anywhere else.
Tread, riser, nosing: the vocabulary
- the tread is the horizontal part of the step, where you put your foot;
- the riser is the vertical face between two treads;
- the stair nosing is the front edge of the tread, which takes most of the knocks and wear;
- the landing is the flat area that breaks the flight or receives it at the top, in front of a door for example.
The substrate matters as much as the tile. A sound, stable concrete or masonry staircase takes tiles very well. A timber staircase, which flexes underfoot and moves with humidity, is poorly suited: we assess it case by case and often suggest keeping the wood and renovating it.
Indoor or outdoor stairs: different requirements
The laying principles stay the same, but exposure changes the choice of tile and the detailing of each step.
| Criterion | Indoor stairs | Outdoor stairs |
|---|---|---|
| Tile | Porcelain or natural stone, never ceramic wall tiles on treads | Porcelain declared frost-resistant, preferably unglazed |
| Surface | Matt or lightly textured, no high-gloss polish | Textured, usually R11 or higher |
| Water | No particular constraint | Slight fall towards the front of each step and the landing |
| Adhesive bed | Full, with no voids under the tile | Full, with adhesive and grout made for outdoor use |
| Stair nosing | Bullnose piece or metal profile | Grippy, clearly visible, frost-resistant piece |
Indoors too, wet soles on a rainy day make a finish that is too smooth slippery: we avoid polished tiles on treads, even when they look good in the rest of the house.
The stair nosing: special piece or profile
How the nosing is detailed decides both the lifespan of the staircase and its look. Three solutions come up most often:
- a bullnose step tile or an L-shaped step piece from the tile range, which gives a soft edge with no joint on the arris;
- a standard tile combined with an aluminium or stainless steel profile, often with an anti-slip insert, which protects the edge and can be replaced if needed;
- a natural stone or full-body porcelain nosing, which keeps the same colour if it chips.
Before ordering, check that the range offers step pieces; if not, a profile is the answer. We advise against mitred edges, two tiles cut at 45° meeting on the arris: they form a sharp, fragile corner that chips at the first knock. The nosing must also stay in line with the tread, with no lip for a foot to catch on.
Outdoors: slip resistance, frost and drainage
An outdoor staircase has to cope with rain, leaves, moss and frost. First, the tile must be slip-resistant: we aim for at least R11 on the R slip-resistance scale, with a textured finish on the treads. Our article on UPEC, R11 and PEI tile ratings explains how to read these classes. It must also be frost-resistant, as confirmed by the manufacturer’s data sheet.
Water must never stand on a step. Each tread and the landing get a slight fall towards the front, away from the house, built into the substrate rather than made up with extra adhesive. Under the tile, the adhesive bed must be full: an air pocket that fills with water and then freezes can be enough to lift a step in a single winter. Materials are chosen as for a tiled terrace.
Laying order and step layout
Before laying, we measure every step. Tiling adds the same thickness to every tread: the intermediate steps keep their height, but the first step becomes taller if the floor at the bottom is not retiled, and the last one lower if the floor at the top is not. A step that differs from the others makes people trip, so these differences are dealt with before laying, by reworking the substrate if needed.
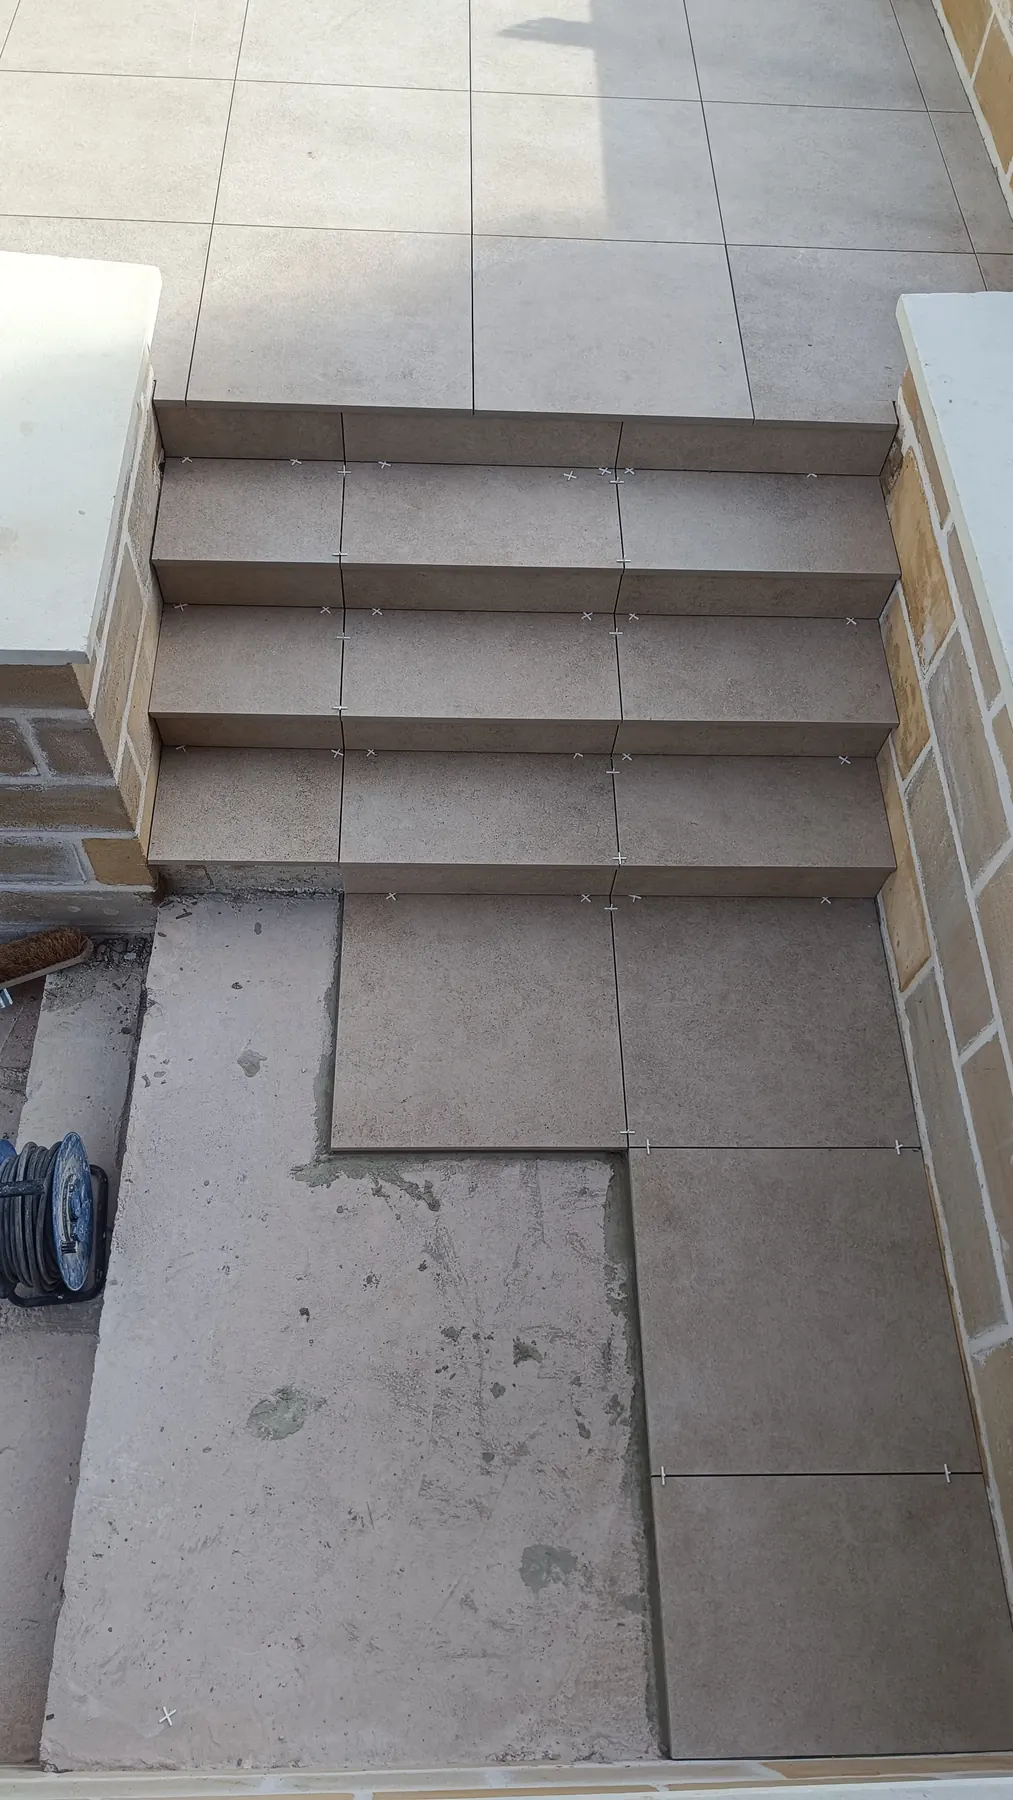
We usually lay the risers before the treads, so that the tread and its nosing overlap the top of the riser, and we work from the top down so that nobody ever steps on a freshly laid tread. The tile layout is then planned for the whole staircase:
- the vertical joints of the risers continue those of the treads, from one step to the next;
- cuts are spread symmetrically at both ends, with no thin strip against the wall;
- on a narrow staircase, one long tile can cover the full width of the tread, with no joint in the middle;
- winder steps, which are tapered, are cut one by one, which takes more time and more tiles.
The principles of a layout plan are explained in our article on tile layout planning.
Landings and the junction with the floor
A landing is treated as a small floor: the same tile as the steps, joints aligned with those of the staircase and, at its edge, the same nosing as the other steps. Indoors, running the hall tiles up to the landing gives a continuous whole; against a parquet floor, a transition profile protects the junction.
Outdoors, a landing in front of a door collects water over its whole surface: its fall takes the water away from the threshold, and a flexible joint separates the tiles from the wall of the house. On a large landing, movement joints absorb the effects of temperature changes.
Safety: even, clearly visible steps
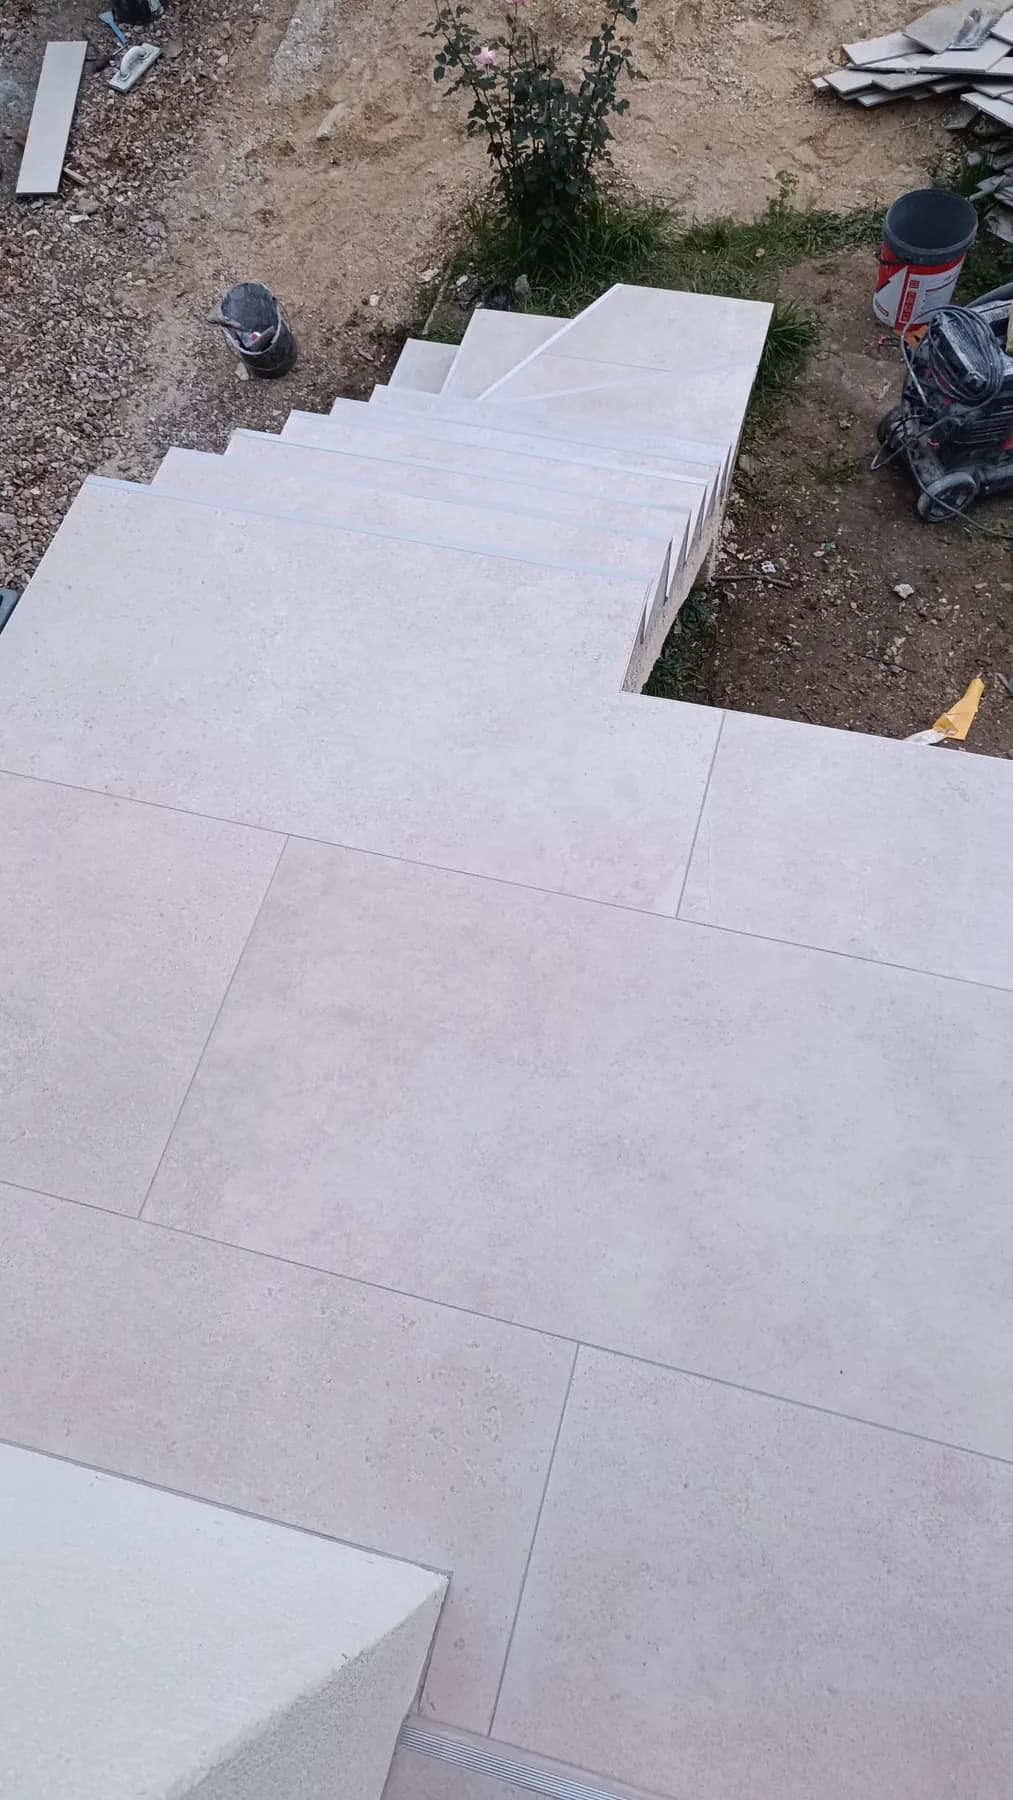
Beyond slip resistance, a safe staircase depends on three things: steps of equal height, enough light and nosings the eye can pick out. On plain tiles, pale ones especially, the steps blur together on the way down: a nosing or a strip in a contrasting colour marks the edge, particularly on the first and last steps, where the change of level begins and ends.
Public buildings and the common areas of apartment blocks follow specific accessibility rules on this point, including contrasting, non-slip nosings. They generally do not cover the stairs of a house you are renovating for yourself, but they remain a good reference.
Looking after a tiled staircase
- indoors, vacuum then use a well-wrung mop, without polishes or wax-based products, which make treads slippery;
- outdoors, sweep away leaves, soil and moss regularly, as they make a step slippery even on an R11 tile;
- in winter, de-icing salt can damage cement grout and natural stone: use it sparingly and rinse the steps in spring;
- after each winter, check the joints and nosings: an open joint lets water in, which then freezes under the tile;
- keep a few spare step pieces, as they are the hardest to find again from the same batch.
We tile indoor staircases as part of our floor and wall tiling work, and outdoor steps together with terraces and outdoor floors, in Louviers, across the Eure and in Île-de-France.
Frequently asked questions
Can a wooden staircase be tiled?
It is rarely a good idea. Wood flexes underfoot and moves with humidity, whereas tiles are rigid: the joints crack, then the tiles come loose, often starting with the nosings. We look at the structure during our visit, but we generally advise renovating the wood itself or choosing a covering that can accept its movement.
Can new tiles be laid over steps that are already tiled?
It is possible if the old tiles are sound, well bonded and carefully prepared, but every step gains the thickness of the new covering. The height of the first and last steps then changes, and the old nosings often have to come off to avoid a build-up at the edge. We measure all of this during the visit before advising you to tile over or strip.
Which tiles are best for an indoor staircase?
A hard-wearing porcelain tile in a matt or lightly textured finish suits most staircases. Above all, check that the range offers step pieces, bullnose or L-shaped, or that a profile in a matching colour exists. Avoid high-gloss polished surfaces on the treads, as well as tiles too thin or too fragile to take the knocks at the edge of the steps.
How long is the staircase out of use during the work?
It depends on the adhesive, the grout and the temperature. When the stairs must stay usable, we can tile every other step, then the rest once the first ones can take foot traffic, following the manufacturers’ waiting times. Outdoors, fresh steps also need protecting from rain and frost while they cure. We agree this schedule with you before the job starts.
Should anti-slip strips be added to a tiled staircase?
Not if the tiles and nosings were chosen well: a textured porcelain and a grippy nosing are enough in most cases. Adhesive strips help on an existing staircase that is too slippery, but they wear, peel off outdoors and hold dirt. For a new staircase, a nosing profile with an anti-slip insert, built into the installation and replaceable, is the better option.